What a Home Inspection Costs in Austin and What You Actually Get for the Money
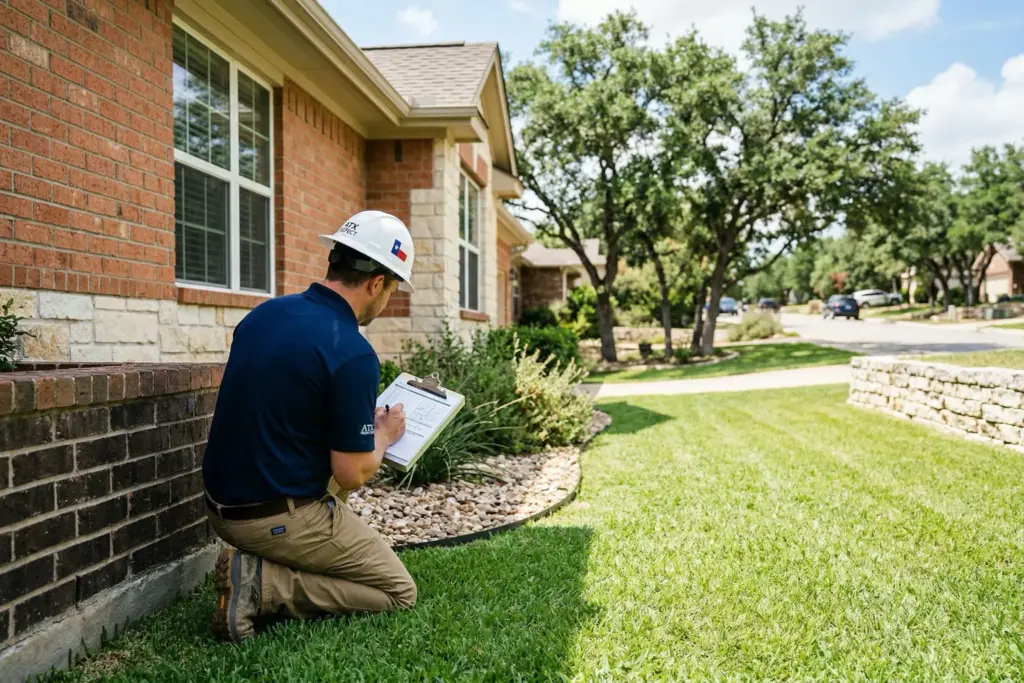
A standard home inspection in Austin runs $295 to $650 in 2026, with most buyers paying between $375 and $500 for a home in the 1,500 to 3,000 square foot range. That price buys you a three to four hour, top-to-bottom evaluation of the property’s major systems, documented in a report that can easily run 40 to 80 pages. According to the Texas Real Estate Commission (TREC), every licensed inspector must follow the same Standards of Practice and use the standardized REI 7-6 report form, which means the scope of your inspection is consistent regardless of which inspector you hire.
But here is the part that trips up most Austin buyers: the base inspection rarely tells the whole story. Add a termite inspection ($100 to $150), a sewer scope ($150 to $300), and maybe a foundation evaluation from a structural engineer ($400 to $800), and you are looking at $800 to $1,500 total. For properties on well water or septic systems in the Hill Country around Dripping Springs or Spicewood, tack on another $250 to $800 for well and septic testing. The base inspection gets you in the door. The specialty inspections tell you what is behind the walls.
The Texas Real Estate Research Center at Texas A&M notes that the option period (typically 5 to 10 days in most Austin contracts) is specifically designed for this due diligence. That clock starts ticking the moment the contract is executed, so buyers who wait until day three to schedule their inspection are already behind.

What Inspectors Actually Check: The TREC Standards of Practice
Texas does not leave the scope of a home inspection to chance. TREC’s Standards of Practice (22 TAC 535.227 through 535.233) spell out exactly what a licensed inspector must evaluate. The standardized REI 7-6 report form covers these major systems and components:
| System/Component | What the Inspector Evaluates |
|---|---|
| Structural Systems | Foundation, grading/drainage, roof structure, walls, ceilings, floors, doors, windows |
| Electrical Systems | Service entrance, panels, branch circuits, connected devices, GFCI/AFCI protection |
| HVAC Systems | Heating and cooling equipment, ductwork, thermostats, ventilation |
| Plumbing Systems | Water supply, fixtures, drains, water heating equipment, gas lines, sewer/waste |
| Appliances | Dishwasher, range/oven, cooktop, microwave, disposal, exhaust fans, bathroom heaters |
| Roofing | Roof covering, flashings, skylights, chimneys, gutters/downspouts, penetrations |
| Insulation & Ventilation | Attic insulation, vapor barriers, attic ventilation, exhaust systems |
| Fireplaces & Chimneys | Fireboxes, dampers, hearths, mantels, gas logs, chimney structure |
| Optional Systems | Sprinkler systems, swimming pools/spas, outbuildings, private water wells, private sewage |
A couple of important things the inspection does not cover: cosmetic issues (paint, carpet stains, minor scratches), anything behind finished walls without visible access, buried pipes, or anything that requires disassembly. The inspector is evaluating what they can see, touch, and operate. They are not tearing open walls or digging up the yard.
The report uses a four-category rating system: Inspected (I), Not Inspected (NI), Not Present (NP), and Deficient (D). “Deficient” means the inspector observed a condition that adversely affects the performance of a system or component, or constitutes a hazard. That is the column you want to read first.
Austin’s Big Five: The Texas-Specific Issues Your Inspector Is Really Looking For
Every region has its own set of recurring problems, and Austin’s are distinctive. A house in Minneapolis faces different threats than a house in Bee Cave or Lakeway. Here are the five issues that show up on Austin inspection reports far more often than the national average.
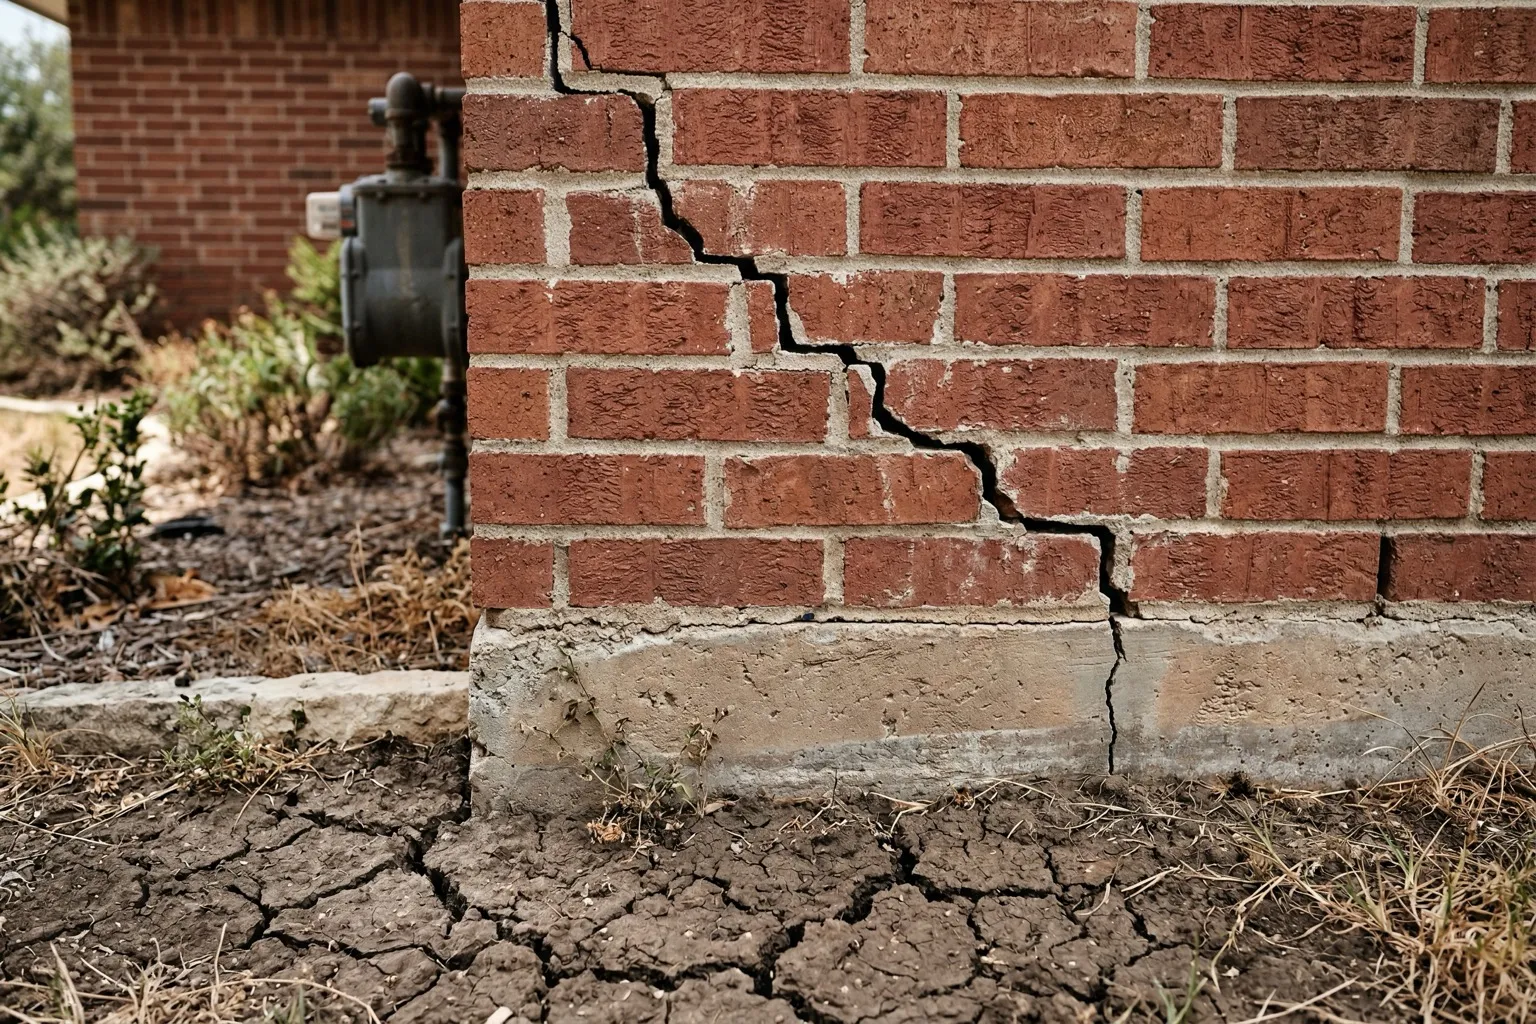
1. Foundation Movement on Expansive Clay Soil
This is the big one. The Taylor Black Clay underlying most of central and eastern Austin belongs to the montmorillonite clay family, among the most expansive soils documented in North America. This soil shrinks up to 30% during drought and swells dramatically during wet periods, generating forces exceeding 10,000 pounds per square foot against foundation systems. The result is foundation movement that can crack walls, jam doors, and create uneven floors across a home’s lifespan.
Signs your inspector will flag:
- Cracks in interior drywall, especially diagonal cracks near door frames and window corners
- Cracks in exterior brick veneer (stair-step patterns along mortar joints are the classic indicator)
- Doors or windows that stick, will not latch, or show visible gaps in the frame
- Uneven or sloping floors (a marble test works surprisingly well)
- Gaps between walls and ceilings or walls and floors
- Separation where the chimney meets the house
Not every crack means catastrophic foundation failure. Hairline cracks in a slab foundation are common and often cosmetic. But cracks wider than 1/4 inch, or multiple signs appearing together, typically warrant a follow-up evaluation from a licensed structural engineer. That evaluation runs $400 to $800 in Austin, and it is worth every dollar if the general inspection raises questions. Foundation repair itself ranges from $5,000 to $40,000 depending on the severity, method, and number of piers required.
Properties in western Travis County and the Hill Country (think Westlake, Bee Cave, and Lakeway) sit on limestone rather than clay, which generally means fewer foundation issues. But limestone creates its own challenges: shallow soil depth, difficulty with drainage, and the occasional surprise when a cedar tree’s root system decides to push against a retaining wall.
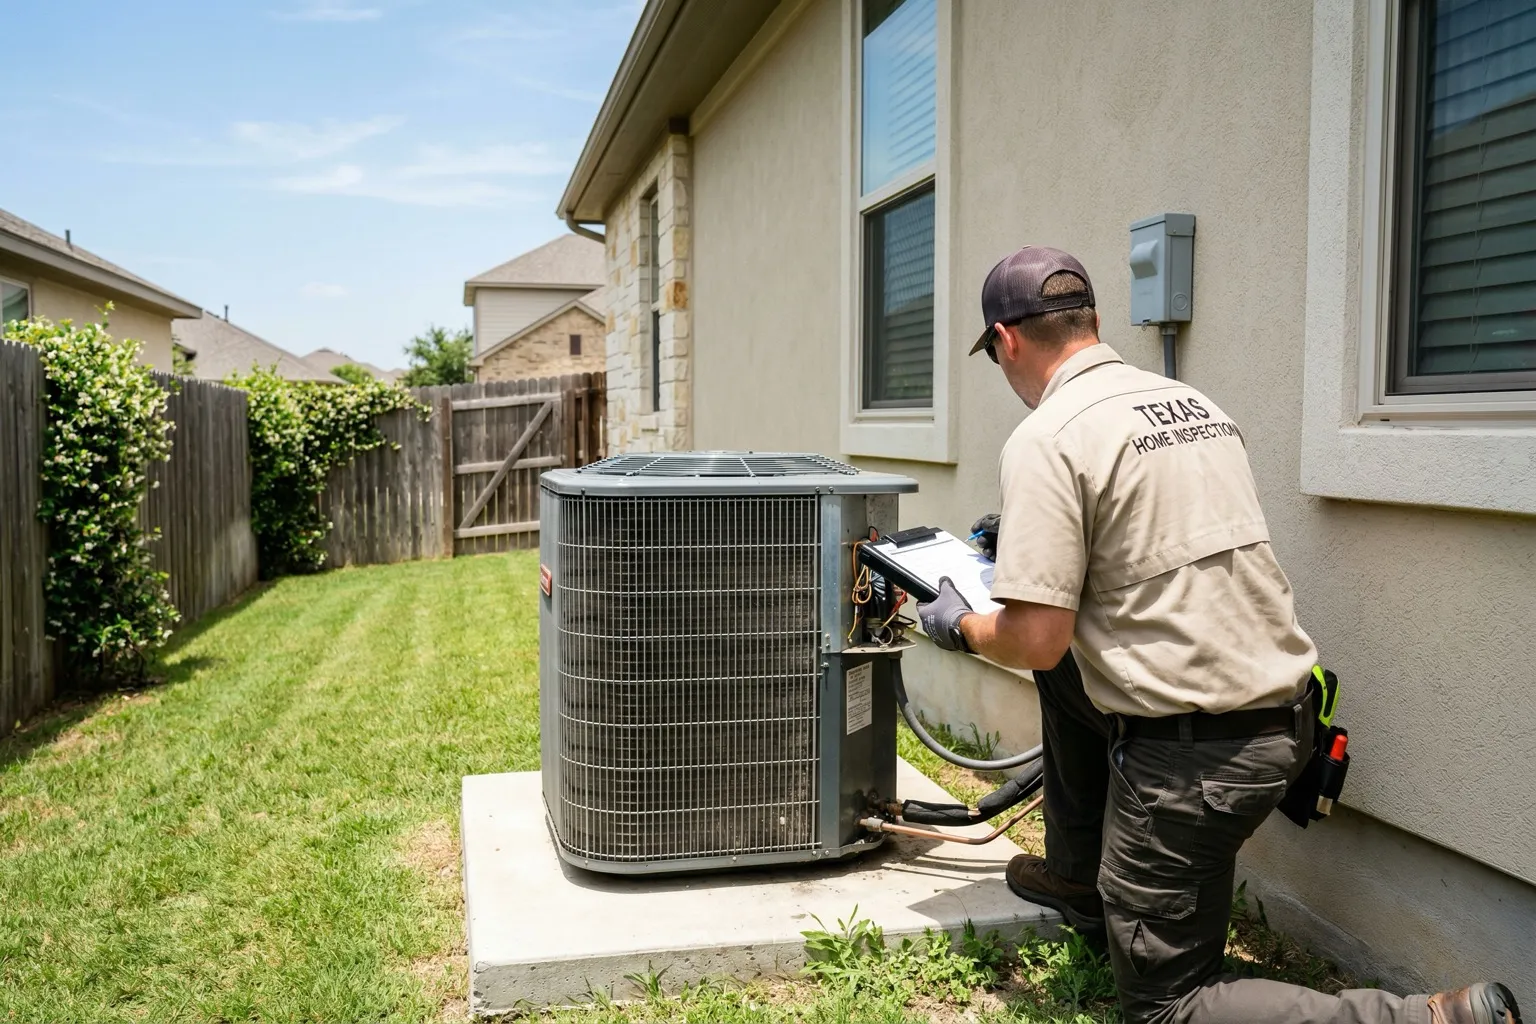
2. HVAC Systems Under Extreme Stress
Austin’s air conditioning systems work harder than almost anywhere in the country. Between late May and early October, temperatures regularly exceed 100 degrees, and a residential AC unit may run 12 to 16 hours a day for months straight. That kind of workload compresses the typical 15 to 20 year lifespan of an HVAC system significantly.
What the inspector checks:
- Age and condition of the compressor (if it is 12+ years old, budget for replacement)
- Refrigerant type (older systems use R-22, which is no longer manufactured and extremely expensive to recharge)
- Ductwork condition, especially in attics where temperatures reach 140+ degrees in summer
- Thermostat functionality and proper cycling
- Evidence of insufficient cooling (ice on lines, water damage around the air handler)
A new HVAC system in Austin runs $7,000 to $15,000 depending on home size and efficiency rating. If the current system is over 15 years old, treat it as at end of life regardless of how it performs during the inspection. A system that runs fine in March may fail in July when it matters most.
3. Plumbing Problems (Cast Iron and Polybutylene)
Austin’s plumbing issues tend to be generation-specific. Homes built before 1980 often have cast iron drain pipes under the slab. These pipes corrode from the inside out over decades, and by the time they are 50 to 60 years old, failures become common. A sewer scope inspection ($150 to $300) sends a camera through the main drain line and can reveal corrosion, root intrusion, bellies (low spots where waste collects), and offsets where pipes have shifted.
Homes built in the 1980s and early 1990s may have polybutylene supply lines. Polybutylene (often identifiable by its gray or blue color) was widely used as a cheaper alternative to copper, but the material degrades when exposed to chlorine in municipal water. Many insurers now require replacement of polybutylene plumbing as a condition of coverage, and repiping a house runs $4,000 to $10,000.
For Hill Country properties on well water or septic systems, the well water and septic guide covers the specific inspection requirements in detail. Short version: a septic inspection ($250 to $500) and well water quality test ($100 to $300) are non-negotiable if the property is not on municipal services.
4. Roof Wear from Hail, UV, and Thermal Cycling
Central Texas gets hailstorms. Not every year, and not as frequently as Dallas or San Antonio, but often enough that roof condition is a primary concern in any Austin home inspection. Hail damage is not always visible from the ground. The inspector will get on the roof (weather permitting) and look for:
- Dented or cracked shingles (hail impact marks)
- Granule loss on asphalt shingles (check the gutters for accumulation)
- Cracked or broken tile (common on older homes in neighborhoods like Westlake and Barton Creek)
- Flashing deterioration around penetrations, valleys, and edges
- Evidence of previous repairs or patches
A full roof replacement in Austin costs $8,000 to $25,000 depending on size and materials. If the roof has a recent insurance claim history, ask for the claim details. Some buyers inherit a roof that was “repaired” with an insurance payout but never actually fixed properly.
5. Electrical Issues in Older Homes
Austin’s older neighborhoods (Hyde Park, Travis Heights, Clarksville, parts of South Austin built in the 1940s through 1960s) may still have original wiring that does not meet current code. Common findings include:
- Two-prong ungrounded outlets throughout the home
- Federal Pacific or Zinsco electrical panels (both are considered fire hazards by most inspectors)
- Aluminum wiring (used in some 1960s-70s construction, requires special connectors)
- Missing GFCI protection in kitchens, bathrooms, garages, and exterior outlets
- Overloaded circuits from decades of added appliances
Upgrading an electrical panel runs $1,500 to $4,000. Rewiring a house is significantly more: $8,000 to $20,000 for a typical Austin home. GFCI outlets are a much simpler fix at $150 to $300 per outlet installed by an electrician.
The Full Menu: Every Type of Home Inspection Available in Austin
Beyond the general inspection, Austin buyers have access to a range of specialty inspections. Not every property needs all of these, but knowing what is available helps you make informed decisions during the option period.
| Inspection Type | Typical Cost | When You Need It | Timeline |
|---|---|---|---|
| General Home Inspection | $295 – $650 | Every purchase | 3-4 hours on-site, report in 24-48 hrs |
| Termite/WDI (Wood Destroying Insects) | $100 – $150 | Every purchase (lenders often require it) | Usually same day as general inspection |
| Foundation Evaluation (Structural Engineer) | $400 – $800 | When general inspection flags foundation concerns | 1-2 hour evaluation, report in 3-5 days |
| Sewer Scope | $150 – $300 | All homes 20+ years old, or any home with large trees near sewer line | 30-60 minutes, results same day |
| Mold Testing | $350 – $800 | Visible mold, musty odors, recent water damage, or history of flooding | Air samples take 2-5 business days for lab results |
| Radon Testing | $150 – $300 | All homes with occupied rooms below grade (less common in Austin) | 48-hour minimum testing period |
| Pool/Spa Inspection | $150 – $250 | Any home with a pool or hot tub | 1-2 hours, report in 24-48 hrs |
| Septic System Inspection | $250 – $500 | All properties on septic (common in Hill Country and rural areas) | 2-3 hours including tank pump-out |
| Well Water Testing | $100 – $300 | All properties on well water | Lab results in 5-10 business days |
| Roof Certification | $150 – $350 | Roofs over 10 years old or with visible damage | 1-2 hours, report in 1-3 days |
| Stucco/EIFS Inspection | $300 – $600 | Stucco or synthetic stucco exterior (moisture intrusion risk) | 2-3 hours with moisture mapping |
A practical approach: schedule the general inspection and termite inspection together (most inspectors offer both or coordinate with a pest company). If the general inspection raises red flags in a specific area, book the relevant specialty inspection immediately. With a 7 to 10 day option period, you do not have time to wait and see.
How to Choose a Home Inspector in Austin
Texas makes this easier than most states because the licensing requirements are rigorous and the verification process is public. Here is how to find a qualified inspector and verify their credentials.
Understanding TREC License Levels
TREC issues three levels of inspector license:
- Apprentice Inspector: Licensed but must work under the direct supervision of a Professional Inspector. Cannot inspect independently.
- Real Estate Inspector: Can inspect independently but has less experience than a Professional Inspector. Requires 194 hours of coursework plus supervised inspections.
- Professional Real Estate Inspector: The highest level. Requires 154 hours of Texas inspector modules plus a 40-hour practicum, comprehensive exams, and at least 325 inspections. Must carry professional liability insurance of at least $100,000.
For a purchase inspection, hire a Professional Real Estate Inspector. There is no cost difference, and the experience gap is significant.
Verifying Credentials
Go to TREC’s website and use the license search tool. Enter the inspector’s name or license number. Verify that:
- The license status shows “Active” (not “Inactive” or “Expired”)
- The license level is “Professional Real Estate Inspector”
- There are no disciplinary actions on file
TREC also publishes disciplinary actions publicly. Check the Disciplinary Actions page and search the inspector’s name before booking.
What to Ask Before Hiring
Beyond licensing, ask these questions:
- How many inspections have you performed in the Austin area? Local experience matters. An inspector who has done 2,000 inspections in Houston may not know Austin’s specific soil conditions, common building practices, or local code quirks.
- Do you carry errors and omissions insurance? TREC requires it for Professional Inspectors, but verify the coverage is current.
- What does your report look like? Ask for a sample. Modern reports include photos with annotations, which are far more useful than text-only reports when negotiating repairs.
- Can I attend the inspection? The answer should always be yes. The walkthrough at the end (when the inspector explains findings in person) is one of the most valuable hours of the entire home buying process.
- How quickly do you deliver the report? In a tight option period, 24 hours is the standard. 48 hours is acceptable. Longer than that creates scheduling problems for follow-up inspections.
Reading the Inspection Report: What Actually Matters
A 60-page inspection report can be overwhelming. Every loose toilet handle and missing caulk line gets documented. The trick is separating the noise from the signal.
The Three-Tier Framework
Sort every deficiency into one of three categories:
| Category | Description | Examples | Action |
|---|---|---|---|
| Safety Hazards | Immediate risk to health or safety | Missing GFCI outlets near water, exposed wiring, gas leaks, no smoke detectors, blocked egress windows | Request repair before closing (non-negotiable) |
| Major Defects | Significant issues affecting structural integrity, major systems, or habitability | Foundation problems, roof failure, HVAC at end of life, plumbing leaks, electrical panel issues | Request repair, credit, or price reduction. May be grounds for termination. |
| Maintenance Items | Normal wear, minor repairs, cosmetic issues | Peeling caulk, dripping faucet, cracked grout, weathered paint, dirty filters | Note for future maintenance. Do not include in repair negotiations. |
Focus your attention and negotiation energy on the first two categories. Sellers (and their agents) take repair requests more seriously when the list is focused on legitimate concerns rather than a laundry list of every minor item.
The Summary Page Is Not Enough
Most inspection reports start with a summary of deficiencies. Read it, but do not stop there. The real detail is in the individual section narratives and photos. An item summarized as “HVAC: Deficient” might mean anything from “the filter is dirty” to “the compressor is failing.” The photos and narrative tell you which one.
Ask Your Inspector to Walk You Through It
A good inspector will spend 30 to 60 minutes walking you through the property at the end of the inspection, pointing out issues in person. If you cannot attend the inspection itself, schedule a phone call to review the report. The written report captures what was found. The conversation captures context: how serious something is, how urgently it needs attention, and what the likely cost of repair will be.
The Option Period: Your Inspection Window in Texas
Texas handles the inspection contingency differently than most states. Instead of a specific “inspection contingency,” Texas uses an option period that gives the buyer an unrestricted right to terminate the contract for any reason during a negotiated number of days.
How the Option Period Works
The buyer pays a non-refundable option fee (typically $100 to $350 in the Austin market) directly to the seller. In exchange, the buyer receives a set number of days (usually 5 to 10, negotiated in the contract) during which they can terminate the contract for any reason and receive their earnest money back.
Key details:
- The option period begins when the contract is fully executed (all parties have signed), not when the option fee is delivered
- The option fee is credited toward the purchase price at closing if the buyer proceeds
- Termination must be delivered in writing before 5:00 PM on the last day of the option period
- If the buyer does not terminate, the option fee is the seller’s to keep and the buyer’s unrestricted termination right expires
Inspection Timeline Within the Option Period
Here is a realistic timeline for a 7-day option period, which is common in Austin’s current market:
| Day | Action |
|---|---|
| Day 0 (Contract executed) | Schedule general inspection immediately. Same day if possible. |
| Day 1-2 | General inspection performed. Attend if possible. |
| Day 2-3 | Receive inspection report. Review with your agent. |
| Day 3-4 | Schedule and complete specialty inspections (foundation engineer, sewer scope, etc.) if needed. |
| Day 4-5 | Receive specialty reports. Make your decision: proceed, negotiate, or terminate. |
| Day 5-6 | Submit repair amendment if negotiating. Seller responds. |
| Day 7 | Deadline. Must terminate in writing by 5:00 PM or the option period expires. |
In a 5-day option period, this timeline compresses significantly. Buyers in that situation should have an inspector pre-scheduled before the contract is even signed, and they should know which specialty inspections they plan to order before the general inspection happens.
Negotiating Repairs After the Inspection
The inspection report is a diagnostic tool. What you do with it is a strategic decision that depends on the market, the property, and your leverage as a buyer.
What to Request (and What Not to Request)
In Austin’s 2026 market, which leans toward buyers in many segments, repair negotiations have more room than they did during the 2021-2022 frenzy. That said, a focused repair request gets better results than a laundry list.
Reasonable to request:
- Safety hazards (always)
- Major system repairs or replacements (HVAC, roof, plumbing leaks)
- Foundation stabilization if recommended by a structural engineer
- Electrical panel replacement if the existing panel is a known hazard (Federal Pacific, Zinsco)
- Code violations that affect safety or insurability
Generally not worth requesting:
- Cosmetic issues (paint touch-ups, minor drywall cracks, worn carpet)
- Normal maintenance items (dirty HVAC filters, caulking, weatherstripping)
- Items you plan to change anyway (outdated fixtures, appliances you will replace)
- Items the seller disclosed upfront and you accepted when making your offer
For a deeper look at repair negotiation tactics, the negotiating repairs guide covers specific strategies for framing requests in ways sellers are more likely to accept.
Three Ways to Structure a Repair Request
- Seller performs repairs before closing. The seller hires contractors and completes the work. Risk: the seller chooses the cheapest option. Mitigation: specify the scope of work or require licensed contractors.
- Seller provides a closing cost credit. The buyer receives a dollar amount credited at closing to offset repair costs. This gives the buyer control over who does the work and how. Often the preferred option for HVAC or roof issues.
- Price reduction. The purchase price is reduced to account for needed repairs. This affects the appraisal comparison and loan-to-value ratio, so it works differently than a credit. Best for large-ticket items where the market data supports a lower price.
When to Walk Away
Some inspection findings are deal-breakers. If any of these show up and the seller will not address them, walking away may be the right call:
- Active structural failure (not just cosmetic cracks, but actual foundation failure requiring $30,000+ in repairs)
- Extensive mold behind walls (remediation can cost $10,000 to $30,000 and there is no guarantee the source is fully resolved)
- Knob-and-tube or aluminum wiring throughout (complete rewire required, $15,000+, and insurance may be difficult to obtain)
- Major fire or water damage that was not disclosed (this raises questions about what else was hidden)
- Environmental contamination (underground storage tanks, asbestos in poor condition, lead paint in deteriorating condition)
The option period exists precisely for this scenario. Use it without guilt. The option fee ($100 to $350) is the cost of the information. Losing that is far better than buying a $450,000 problem.
New Construction Inspections: Why They Are Not Optional
A common misconception: new construction does not need an inspection because everything is new. This is wrong. New construction needs an inspection just as much as a resale home, and in some ways more.
Austin’s building boom means high demand for tradespeople, which means the quality of workmanship varies. A 2024 KXAN investigation found foundation problems plaguing a major new Austin development, highlighting that new does not automatically mean problem-free.
For new construction in the Hill Country, consider two inspections:
- Pre-drywall inspection ($200 to $400): Done after framing, plumbing, and electrical rough-in but before drywall goes up. This is your one chance to see what is behind the walls. Look for proper framing connections, correct plumbing slopes, secure electrical boxes, and insulation coverage.
- Final inspection ($350 to $550): Done after the home is complete but before closing. Same scope as a resale inspection, checking all systems and finishes.
Builder warranties typically cover defects for 1 to 10 years depending on the component (1 year for workmanship, 2 years for systems, 10 years for structural). The inspection report documents the home’s condition at delivery, which becomes your baseline if you need to make a warranty claim later.
Pre-Listing Inspections: The Seller’s Secret Weapon
Inspections are not just for buyers. Sellers who invest $400 to $600 in a pre-listing inspection before putting their home on the market gain several advantages.
A pre-listing inspection lets you:
- Fix issues before they become negotiation leverage for the buyer
- Price the home accurately by accounting for known conditions
- Disclose known issues proactively (which builds trust and satisfies Texas disclosure requirements)
- Reduce the chances of the deal falling apart during the option period
- Shorten the overall transaction timeline
Ed Neuhaus, broker of Neuhaus Realty Group, recommends pre-listing inspections for homes over 15 years old: “The $500 you spend on a pre-listing inspection saves you $5,000 in last-minute concessions. Buyers negotiate harder when they feel like they discovered a problem. When it is already disclosed and priced in, the dynamic changes completely.”
For a detailed walkthrough of what sellers should expect, see the guide on what to expect during a pre-listing inspection.
Specialty Inspections: When You Need More Than the Standard Report
The general inspection is a broad survey. Specialty inspections go deep on specific systems. Here is when each one is justified.
Foundation Evaluation by a Structural Engineer
When to get one: The general inspection notes diagonal cracks, sticky doors, uneven floors, or visible foundation movement. Also recommended for any home over 30 years old on clay soil in central or east Austin.
What it includes: A Professional Engineer (P.E.) performs a floor elevation survey using a manometer or laser level, measures differential movement across the slab, evaluates crack patterns, and provides a written opinion on whether repair is needed and what method is appropriate.
Cost: $400 to $800. The engineer’s report carries far more weight than a general inspector’s notes on foundation condition, and it is the document you will reference in repair negotiations.
Sewer Scope Inspection
When to get one: Any home over 20 years old. Any home with large trees (especially live oaks) near the sewer lateral. Any home where the general inspection notes slow drains.
What it includes: A plumber feeds a waterproof camera through the main sewer line from the cleanout to the city connection (or septic tank). The video reveals root intrusion, pipe corrosion, bellies, offsets, cracks, and blockages. You receive the video file along with the plumber’s assessment.
Cost: $150 to $300. This is one of the highest-value specialty inspections. A sewer line replacement can cost $5,000 to $15,000, and a scope catches problems that are completely invisible during a general inspection.
Mold Testing
When to get one: Visible mold growth, musty odors (especially in closets, bathrooms, or around windows), recent water damage, or the property sits in a flood zone.
What it includes: Air quality sampling (capturing airborne spore counts and comparing indoor levels to outdoor baseline) and surface sampling of visible growth. Lab results identify the type and concentration of mold present.
Cost: $350 to $800 depending on the number of samples. Lab results take 2 to 5 business days, which matters in a tight option period. If you suspect mold, schedule testing immediately alongside the general inspection.
Pool and Spa Inspection
When to get one: Any home with a pool or hot tub. General home inspectors often note pool equipment as “Not Inspected” because pool systems require specialized knowledge.
What it includes: Pump and motor condition, filter system, heater, automation/controls, interior surface condition (plaster, pebble, fiberglass), decking and coping, safety features (fencing, alarms, drain covers), and an assessment of remaining useful life for major components.
Cost: $150 to $250. Pool equipment replacement can easily run $3,000 to $8,000 (pump, filter, heater), and a replaster costs $5,000 to $15,000. The inspection is cheap insurance.
Radon Testing
When to get one: Less critical in Austin than in many parts of the country. The EPA classifies Travis County as Zone 3 (low potential), but individual homes can still have elevated levels, especially those built on limestone with cracks in the slab.
What it includes: A detector is placed in the lowest livable area of the home for a minimum of 48 hours. Results show the average radon concentration in picocuries per liter (pCi/L). The EPA action level is 4.0 pCi/L.
Cost: $150 to $300. Radon mitigation (if needed) runs $800 to $2,500 for a sub-slab depressurization system. Relatively straightforward and effective.
Termite and Wood-Destroying Insect Inspection
When to get one: Every purchase. Many lenders require a WDI inspection as a condition of the loan, particularly for VA and FHA financing.
What it includes: A licensed pest inspector (separate from the home inspector, though many companies offer both) checks for evidence of termites, carpenter ants, wood-boring beetles, and other wood-destroying organisms. They inspect the foundation perimeter, crawlspace (if present), attic framing, and any wood-to-soil contact points.
Cost: $100 to $150. Termite treatment for an active infestation runs $500 to $2,500 depending on the method and extent. For a complete checklist of what Central Texas buyers should watch for, including termite-prone areas, that guide provides a detailed breakdown.
What Your Inspector Cannot Tell You (and Who Can)
TREC’s Standards of Practice define what a licensed inspector evaluates. Several important property concerns fall outside that scope:
| Concern | Who to Consult | Why It Matters in Austin |
|---|---|---|
| Property survey and boundary lines | Licensed surveyor | Fence lines often do not match actual property boundaries, especially in older neighborhoods |
| Flood zone status | FEMA flood maps, your insurance agent | Austin’s topography creates flood risk that is not always obvious from the street |
| HOA rules and restrictions | HOA management company, HOA documents | Some HOAs restrict rentals, exterior modifications, parking, and more |
| Environmental hazards (asbestos, lead) | Environmental testing company | Homes built before 1978 may contain lead paint; pre-1980 homes may have asbestos in insulation, tile, or siding |
| Property tax assessment and exemptions | Travis/Williamson/Hays CAD | New buyers lose the seller’s homestead exemption, which can increase tax bills 20-40% |
| Insurance availability and cost | Insurance agent | Austin insurance costs vary dramatically by location, claims history, and roof age |
| Zoning and future development | City planning department | Nearby commercial development, road projects, or rezoning can affect property value |
A thorough due diligence process during the option period goes beyond the physical inspection. Neuhaus Realty Group recommends that buyers also review the seller’s disclosure, check the property’s flood zone status, request HOA documents (if applicable), and verify tax assessment details before the option period expires.
Common Mistakes Austin Buyers Make During the Inspection Process
After years of working with buyers in the Austin market, patterns emerge. Here are the mistakes that cost people the most time, money, and stress.
- Waiting too long to schedule. Call your inspector the same day the contract is executed. In a busy spring market, the best inspectors book out 3 to 5 days. Waiting until day 2 or 3 of a 7-day option period puts you in a bind if specialty inspections are needed.
- Not attending the inspection. The written report captures findings. Being there captures context. You learn more in the 30-minute walkthrough than in an hour of reading the report alone. Ask questions. Touch the cracks. Look under the sinks. It is your money.
- Confusing maintenance items with defects. A dirty HVAC filter is not a negotiation point. A 15-year-old compressor with failing capacitors is. Know the difference before you send your repair request. Overstuffing the list with minor items makes sellers less likely to agree to the big ones.
- Skipping the sewer scope. This is the most under-ordered specialty inspection. A $200 sewer scope can reveal a $10,000 problem that is completely invisible during a general inspection. For any home over 20 years old, it should be standard.
- Hiring based on price alone. A $250 inspection from a brand-new inspector is not the same as a $450 inspection from a Professional Inspector with 2,000 local inspections under their belt. The difference in quality often shows up in what they catch, not in how the report looks.
- Forgetting about the option period deadline. The option period is a hard deadline. If you need to terminate, the written notice must be delivered by 5:00 PM on the last day. Missing this deadline by even one hour means you lose your unrestricted termination right and your earnest money may be at risk.
- Treating every deficiency as a deal-breaker. No house is perfect. Not the new construction. Not the remodel. Every property will have items in the inspection report. The question is whether the issues are manageable and priced into the deal, or whether they represent a risk you cannot accept.
What to Do After the Inspection: A Decision Framework
You have the report. You have the data. Now you have to decide. Here is a straightforward framework that works for most situations.
Step 1: Categorize every deficiency. Use the three-tier system above (safety hazards, major defects, maintenance items). Ignore the maintenance items for negotiation purposes.
Step 2: Get repair estimates. For any major defect, get a rough cost estimate. Your agent, inspector, or a quick phone call to a contractor can give you a ballpark. You need numbers to negotiate effectively.
Step 3: Compare repair costs to your deal terms. If you are buying a $450,000 home and the inspection reveals $5,000 in repairs, that is roughly 1% of the purchase price. Context matters. If the home was already priced below market, you may absorb those costs. If you paid full asking price, a credit is reasonable.
Step 4: Decide your path.
- Proceed as-is. The issues are minor or you have already accounted for them in your offer.
- Request repairs or credit. Submit an amendment to the seller requesting specific repairs or a dollar amount credit at closing.
- Terminate. The issues are too significant, the seller will not negotiate, or the total cost of repairs changes the economics of the deal. Exercise your option period termination right and get your earnest money back.
Step 5: Act before the deadline. Whatever you decide, do it with enough time to negotiate within the option period. Submitting a repair request on the last day of the option period gives the seller zero incentive to cooperate.
The step-by-step Austin home buying process guide covers how the inspection fits into the broader timeline from contract to closing.
Frequently Asked Questions
Making the Most of Your Home Inspection in Austin
A home inspection is not a pass/fail test. It is a detailed snapshot of the property’s condition on a specific day, performed by a trained professional using standardized criteria. The value comes from what you do with the information.
For buyers in Austin, Bee Cave, Lakeway, and the surrounding Hill Country, the inspection process has a few layers that do not exist in other markets. The clay soil, the HVAC demands, the cast iron plumbing in older homes, the well and septic systems in rural areas. Understanding these regional factors before you start the process puts you ahead of most buyers.
Schedule early. Attend the inspection. Read the full report. Focus your negotiations on what matters. And use the option period for exactly what it was designed for: making an informed decision about one of the largest purchases of your life.
Have questions about a specific property or need help understanding an inspection report? Contact Neuhaus Realty Group for guidance from a team that understands the Austin market inside and out.


